Christmas DIY: Dress Form Tree

I have always been one of those people staunchly against decorating for Christmas before Thanksgiving (although I decorate for Halloween in mid-August when Walt Disney World starts their Halloween party, I know I'm not consistent and I don't care). However, 2020 has seriously challenged me in that practice. Early in this year, I accepted a new job and ended up moving at the end of March as the pandemic was becoming more concerning throughout the country. That means I've been cooped up in my new apartment and unable to meet really any new people outside of work. That makes me super bored and the inability to travel or plan trips means I got antsy a lot. When I get antsy, I come up with crafts and things to keep me from getting bored with my surroundings.
All of that to say that I needed things to lift my spirits after my favorite holiday (Halloween) ended and I decided the best way to occupy myself was to create something I've wanted to for at least a few years now: a dress form Christmas tree. I know that you can buy them premade at some places but they were expensive and nothing quite fit the aesthetic I wanted. I've also wanted a dress form for years now so this killed two birds with one stone!
I have seen maybe one or two actual tutorials of this done years ago so it never hurts to see what worked for others, right?
The Supplies:
To start off, you'll need your supplies. The supply list is relatively short, although you need a lot of one thing. Obviously, you'll need a dress form. I picked out this dress form from Amazon after doing a good bit of searching.

Dress form: (this one is unavailable but Amazon has quite a few other options) https://www.amazon.com/gp/product/B078JBKD2Q/ref=ppx_yo_dt_b_asin_title_o02_s00?ie=UTF8&psc=1
If you have the time and inclination to do so, peruse some antique stores and flea markets for a unique vintage dress form. Being in a pandemic, I decided this might not be the best option at the moment. They also sell dress forms at Hobby Lobby or adjustable ones for actual clothing fitting, but I went for the decor aspect and wanted something relatively simple that was adaptable to whatever I wanted.
Next, you'll need chicken wire and some hanging wire, as well as a wire cutter. This is what will make up the structure of the skirt. You can do it without, but it's not going to have the structure of a tree. From my experience, you may want to consider some gloves while you're working with the chicken wire as well since it's pretty pokey and I managed to stab myself a reasonable number of times!
Here's the chicken wire I purchased: https://www.lowes.com/pd/Garden-Zone-gray-Steel-Poultry-netting-Common-50-x-2-Actual-50-x-2/1000638921
The biggest need for this project is the garland to make up the tree. You can buy whatever garland you'd like for this project, but you'll need a lot so decide what kind of cost commitment you want to make first. I intend for this to be reusable each year so I wanted it to last but I can always add or adjust as needed. I ended up buying a long strand of super cheap garland from Walmart to wind around directly on top of the chicken wire and add a bit more coverage. Then I purchased quite a few lengths of wired or branch garland. It's not the nicest garland ever, but since I was wrapping it around chicken wire and adding lights and ornaments I was okay with it. I did have to go back a couple of times to get more garland because it took more than I thought it would! (Seriously, 100 feet of garland seemed like plenty to start, but it wasn't!)
Wireless garland: walmart.com/ip/Holiday-Time-Non-Lit-Soft-Christmas-Garland-50/334155967
Wired/Branch garland: (they only have the 9 ft listed online but I found 12 ft as well & ended up with about 7 of these and a couple 9 ft) https://www.walmart.com/ip/Holiday-Time-Non-Lit-Branch-Christmas-Garland-9/650292907
Finally, you'll need lights! I used a couple of strands of the inexpensive lights from Walmart and it worked out perfectly.
Obviously, you'll also need whatever decorations you want to use on the tree, and I recommend either buying a shirt for the top of the dress form or doing what I did and making your own.
The Project:
One of the first things you'll need to decide before you get started creating your tree, you need to decide if you want to have the option to remove the tree "skirt" from your dress form so that you can use the form for other things during the rest of the year. I wanted the option to use my dress form as decor year-round so I had to figure out the best way to make sure the skirt was removable.
One key thing to remember so you don't have to do what I did is to put the shirt on the dress form before you get very far into the project and make sure it's tucked in good to the skirt. It's not super fun to have to figure it out afterwards!

Once you get the structure how you want it, it's time to add the garland! I started with the unwired garland, wrapping it around the wire and looping it through a section occasionally to make sure it didn't move too much. Then I started with the branch garland, starting at the top and winding a branch of the garland around a section of chicken wire occasionally to keep it from moving. If you're trying to make sure the skirt is removable, make sure not to wrap the garland all the way around at the top. I went back and forth at the top, keeping the section with the hanging wire open. I planned to have the dress form in a corner anyway, so no one was going to see the open space.
Just keep winding the garland around, attaching at various points, and try and make sure everything is covered as much as possible. If you find a somewhat bare spot a bit later on, you can adjust the garland some but you can also use that as a spot for a sprig of something or an ornament!

Once you've gotten the garland attached and adjusted as you want, it's time to add the lights! This part is pretty simple, just wind the lights around and nestle it in the branches whenever you can to make sure it doesn't move much. Once the lights are done, you're ready to decorate!

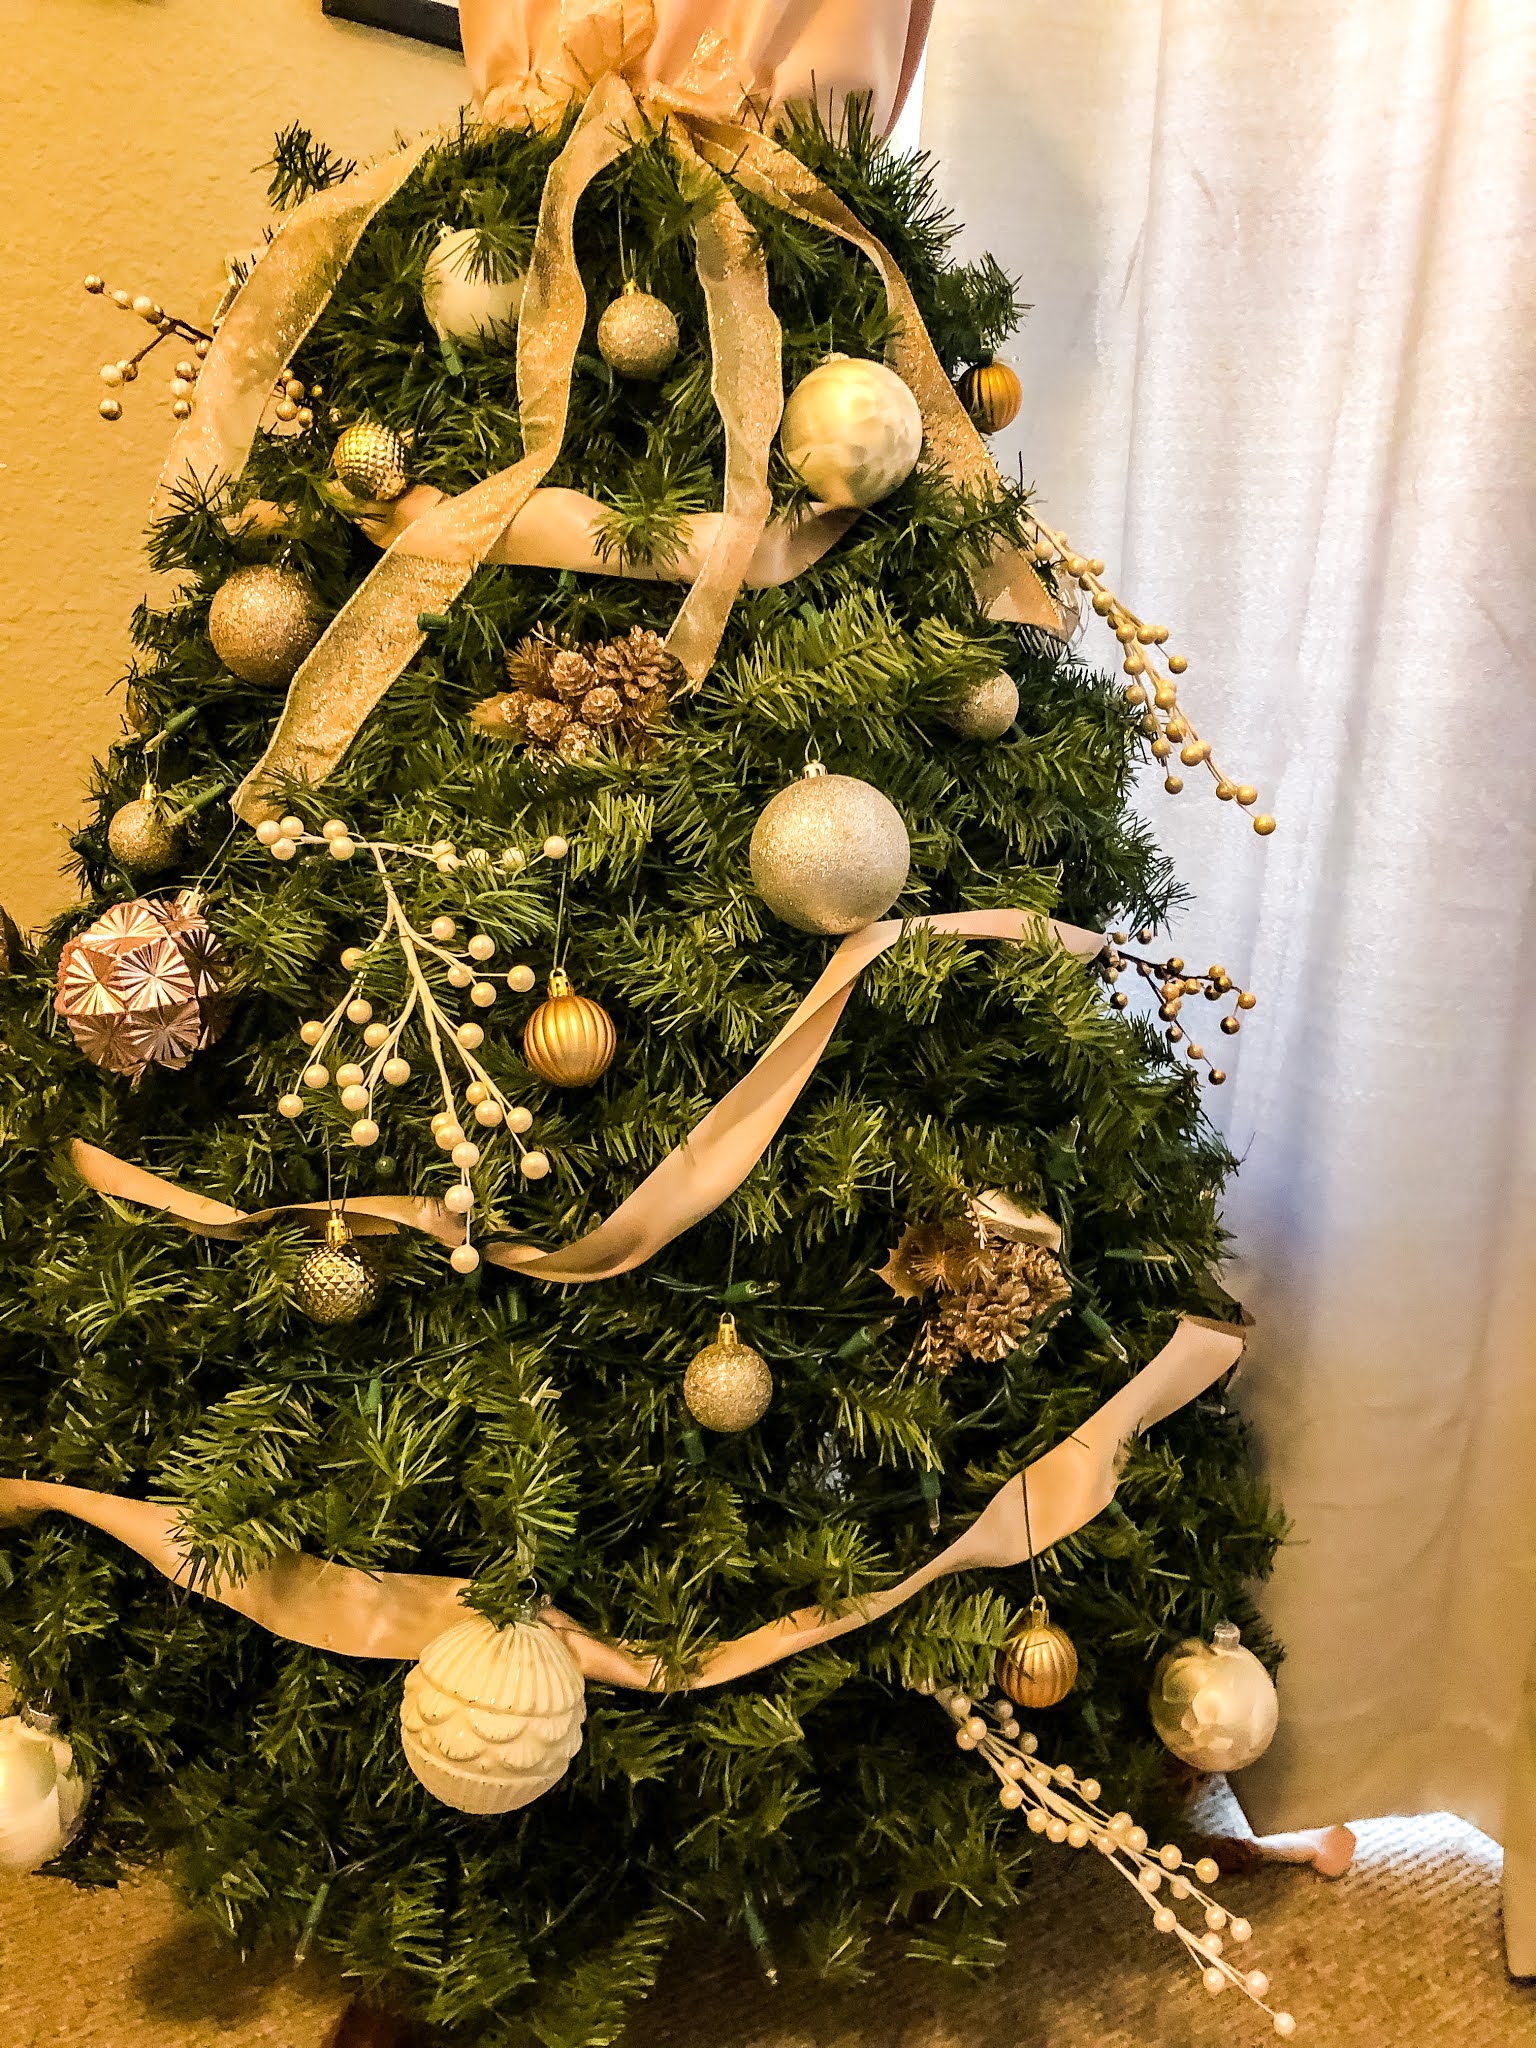
For my dress form, I wanted to utilize a color palette of golds, rose golds, white, and silver. I wanted my dress form to feel like she was in a fancy dress so rather than try and find a shirt that worked for my vision, I bought a yard of satin fabric in a rosey color that I folded over at the top and wrapped around as a shirt, a yard of tulle that I pinned underneath the front as a shawl/straps, and got a rose gold wired ribbon to connect the shirt with tree "skirt". I added one of my necklaces for good measure!

For the decorations, I had a non-wired rosey ribbon that I wrapped around and got some sprigs of rose gold/champagne decor from Hobby Lobby and some white, gold, silver, and rose gold ornaments that I got from various places after Christmas and at Dollar Tree. At this point, it's just a matter of sticking the decor where you want and enjoying your creation!

I hope you enjoyed my DIY, and if you make your own, let me know! I love having this tree in my bedroom and I'm sure I'll look forward to decorating it every year!


Comments
Post a Comment